Detailing
Let’s start looking at other detail. My scene is at the point where more geometry detail will help. My lighting will create more interesting shapes when I have more interesting objects to light.
Does that mean it’s time to start modeling?
Not yet! Modeling is slow and time-consuming. And modeled detail is usually very localized – it only takes up a small part of a level. In the early stages, we want to always think in broad strokes.
Reuse assets
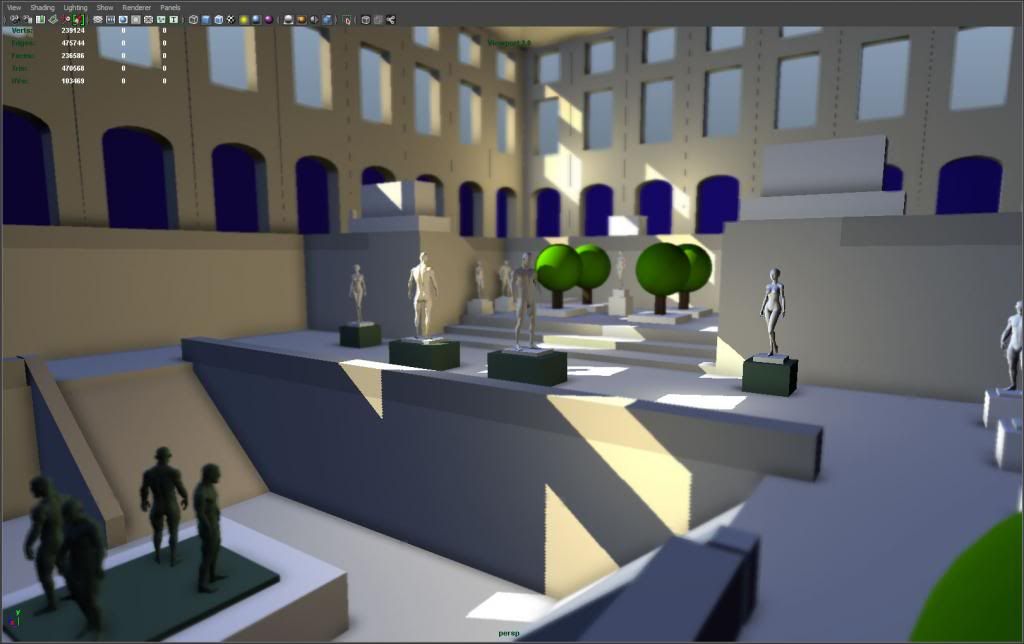
A better strategy here is to use old models and assets – in this case, I have some character meshes that I can use as stand-ins for statues.
Don’t have existing models? Look at free model libraries on the internet. Mudbox’s included base meshes can also be a good place to start.
Simple modeling – the next step up from primitives
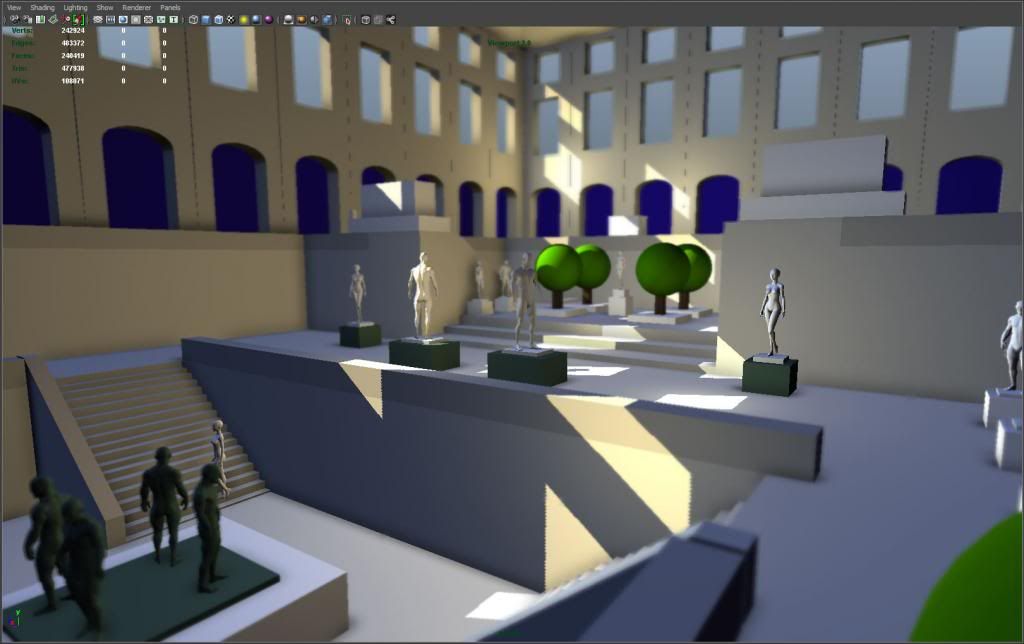
Another example is simple modeling. Below, I’ve added stairs, instead of ramps. Light plays on those surfaces in a more interesting way, but it only took a minute or two to model.
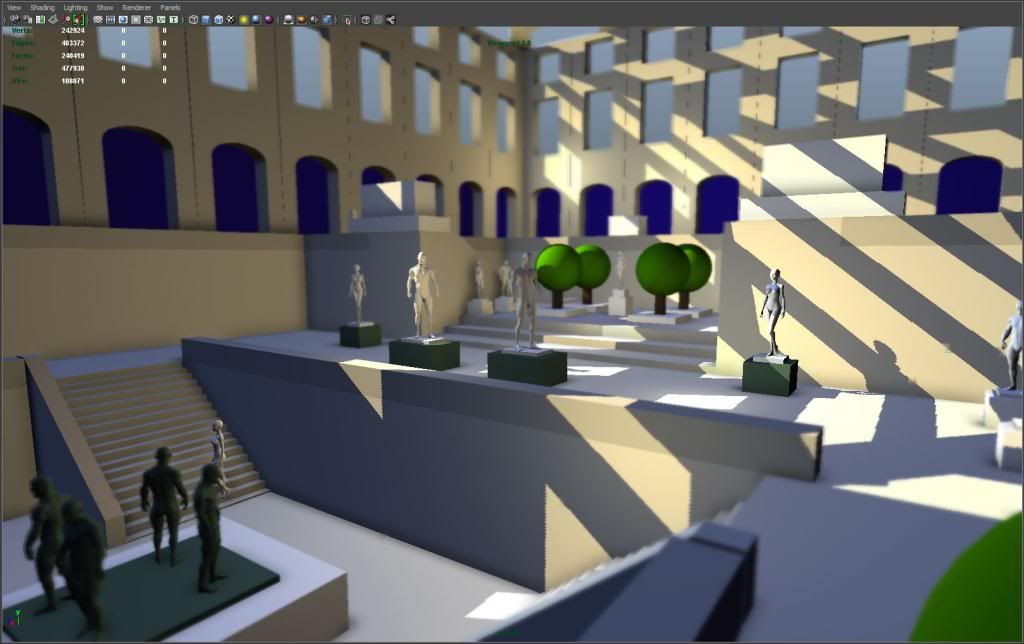
Another quick change is the grid-like glass ceiling above the room. A few quick extrusions give me this effect, which creates more interesting patterns of light and shadow.
At this point I could revisit lighting for the room, add more bounces, etc.
Blockout complete
This is as far as I’d take it as a blockout. At this point, I’d start building real art assets.
I’d still think in terms of bang for buck, though. I want to consider how I can have the biggest effect on my level for the least time/effort investment.
That way, my level keeps growing quickly, as opposed to getting bogged down in tiny details. Learning to think like this is one of the biggest benefits of creating a simple level blockout!
What is the next step?
My next step would be texturing – by creating a nice tiling marble floor or wall texture, I could cover large swathes of my environment for a relatively low investment of effort.
My tiling texture tutorial goes into a bit of detail on creating that kind of texture, and is a good follow up to this post!
To summarize, a good blockout process looks something like this:
- Blocks: Use cubes and spheres to create the major shapes like walls, floors, and obstacles.
- Colors: Add colored shaders to make your environment resemble your final goal.
- Lights: Create basic lighting to show everything.
- Re-use: Re-use your old models and textures to quickly add detail.


Hey, I’m new to maya and have a few question regarding grid settings and scaling. I’v been doing a lot of searching around and can’t seem to find what I’m looking for so hopefully you guys can help. Now i know maya is used for modeling, thats obvious, but can you use maya to build a complete level then export it to unity for rendering purposes? I’m concerned because mayas grid seems to small for a complete level unless i have to scale objects really small to fit the grid. is it ok to build off the grid but stay leveled with the grid?
You can model off the grid, no worries. The grid is just a visual guide. You can adjust your scene’s unit of measurement in your window>settings/preferences>preferences menu, if you need to adjust to say, feet, to match your unity scene.
ok Great! thanks for your input james 🙂
Hey, been modeling stuff for environments and it is tough work I have to say, been at it on and off for about a year now and it still feels as if though I’m a novice. The thing that’s bothering me is the mapping that needs to be done and what type of mapping. UV mapping I can grasp but lightmapping and what else is there one should be aware of? I’ve been looking at architectural visualization and feels like it’s impossible to even come close to some renderings out there. I notice progress but my mapping seems wrong even though it’s right in my eyes. I wish I could put my finger on it. I’m not studying at a university or course so the amount of knowledge out there is overwhelming just grasping after something on the web. If I even got a question out of this post I don’t know, maybe I’m just getting rid of some steam, who knows.
Thanks for the well thought out tutorial by the way, certainly got me off the nitpicking when blocking out my scene. thanks!
What you are going through is normal. Right now, your eye and your mind are able to recognize when something is good, and when it isn’t. But your skills as an artist are still catching up, so you feel frustrated that you can’t match what you see in your head. Every artist goes through this! Keep practicing, eventually you will come out the other side.
I would advise, don’t focus on technical aspects. Focus on making things look good, even if you have sloppy geometry or UVs or whatever. Once you know how to make something look good, then you can go back and address technical issues.
Thanks for a great technique showcase!
One problem I keep having for 2 years now is that once I have 8 or so lights in the scene, any additional lights stop working! I have no idea how to fix this, and it is really limiting my lighting.
Any idea on what’s up with that?
P.S I found out that it is a software limitation… But how am I supposed to do this with just 8 lights? (really confused)
Ok I solved the problem.
I simply clicked on the Vieport 2.0 settings box, and there was a slider for maximum amount of lights that would show up.
Previously I changed the Viewport display setting (which is in the display preferences) to DirectX11 from OpenGL, not sure if you can increase the light limit with OpenGL.
All good 🙂
Glad to see you figured it out! Even with that slider, the lights do max out at some number (like 32 or 64). So for big scenes with lots of light sources, you are stuck with pre-rendering!
Your site overall is like a small Holy Grail for the evolving 3d artist. Thanks again and again, and this will be, at the risk of getting annoying, the last big thank you for now : )
Glad to hear it is helpful, Harry! 🙂