You know that creating a simple level blockout (aka greyboxing) is a necessity for video game artists. But this simple skill can also make you a better artist all around.
As for how it can do that – I like to compare a blockout to Cliffs Notes.
Since everyone has used them, I know you know that Cliffs Notes boil a book down to its essence. All the magic of the text is gone – but the main beats of the story are all still there. It’s the skeleton of the story.
A blockout does basically the same thing for an environment.
How does a blockout make you a better artist?
To make a blockout, you have to decide what is most crucial, most essential, to your level.
And then you have to figure out how to represent that essence of your level as quickly and as cheaply as possible. Building the blockout makes you visualize what you’re going to do – to plan ahead.
For this reason, I think creating a simple level blockout is some of the best practice a new artist can get. Learning how to identify the essence of a thing is one of the most important skills an artist can have!
Creating a simple level blockout!
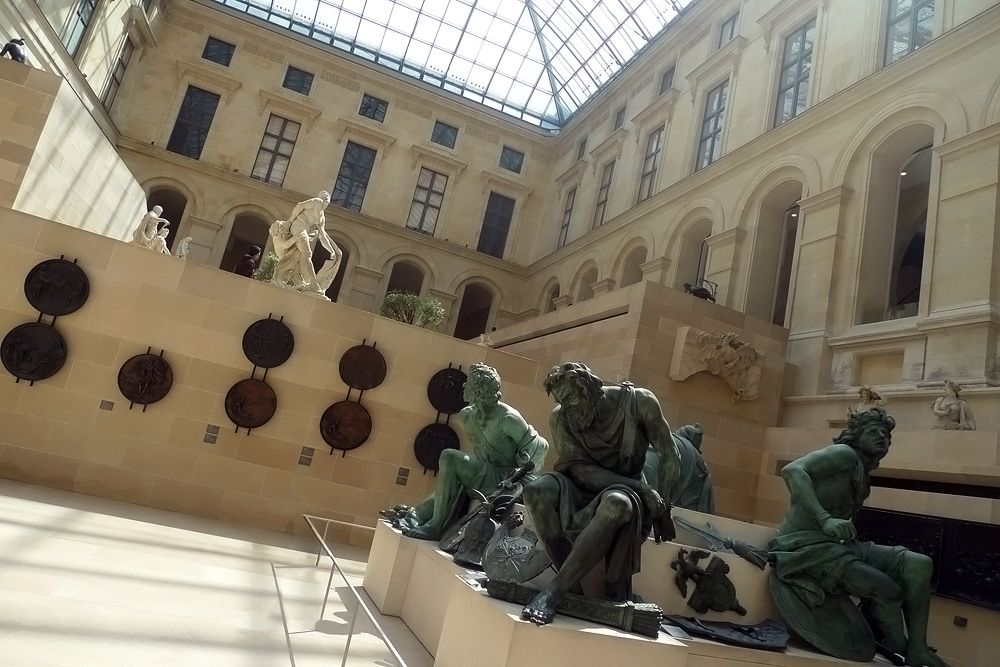
For this example, I am using some reference photos I took of a sculpture garden in the Louvre. Let’s build a blockout!
Should I spend a lot of time in the modeling phase?
Step one – we have to build something. But before we get caught up in trying to create super-detailed statues and intricate marble textures, let’s represent the overall shape of the environment.
That’s the purpose of a blockout: to quickly represent something, without investing much time or effort.
Based on this rough representation, we can judge whether we want to continue with a project – or if we’d rather cut our losses before it goes any further!
Begin with standard primitives.
I start the block out of the sculpture garden by approximating my photo reference with very simple geometric shapes like cubes and spheres.
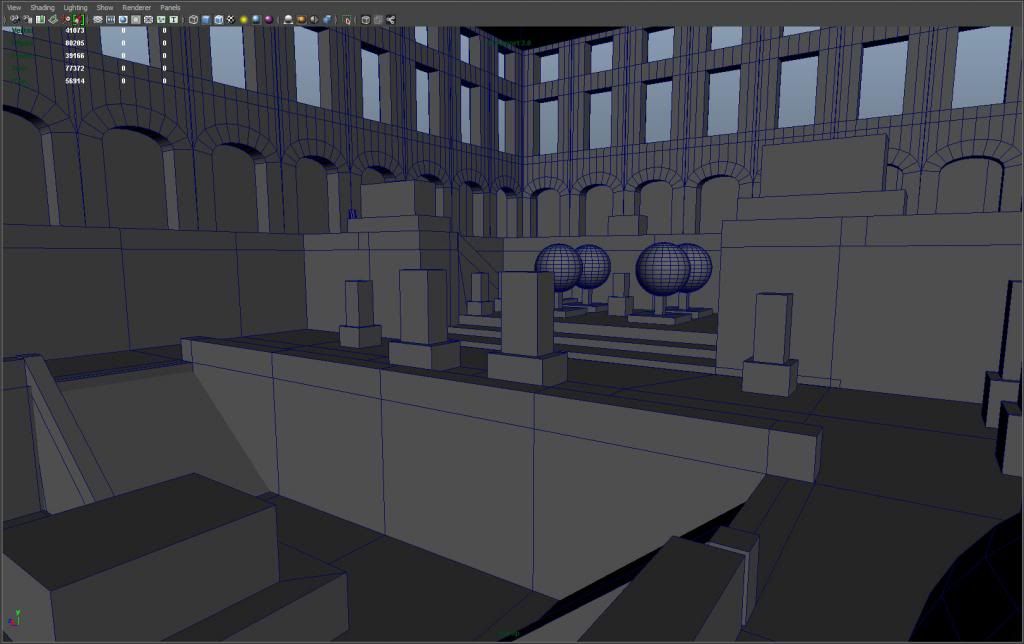
Flat grey boxes don’t really communicate that much, though. Is it time to start modeling detailed stuff now?
With a blockout, we want to do the greatest amount of work, as quickly as possible, with the least amount of effort. Modeling is time and effort intensive. And besides, there is a change that we can make that is much easier, and will better capture the whole of our scene.
Color!
We get so used to looking at grey lambert that we forget that we can change it. Let’s add some color – if we add basic colored lamberts, we represent the environment more faithfully, without spending more than a few seconds.
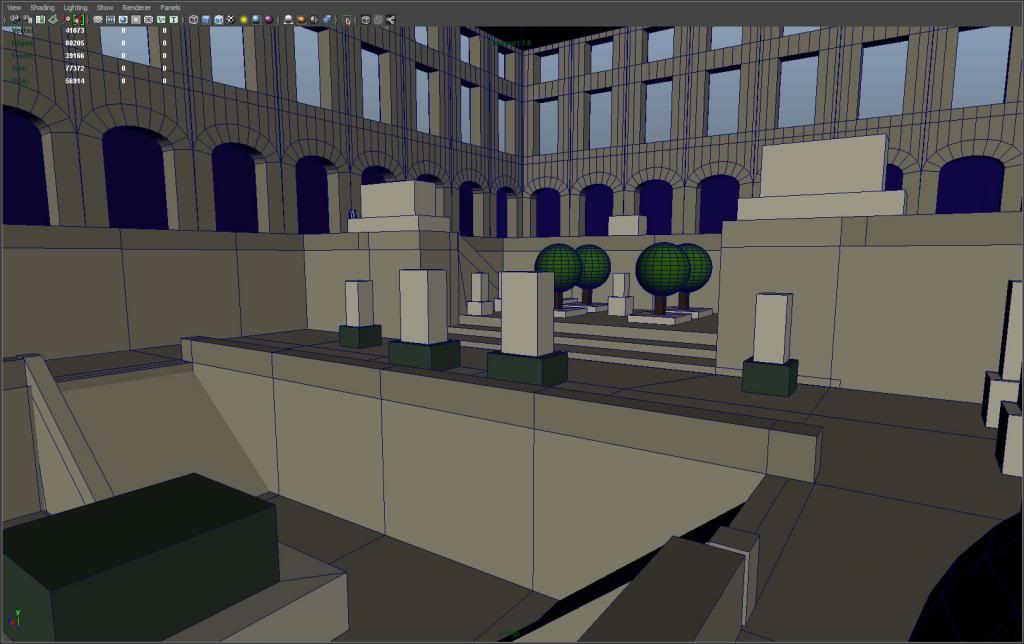
What else is easy to do?
The blockout phase is about quickly adding visual detail. Any kind of visual detail. Usually a blockout is not for our own edification; it’s for managers or art directors or professors, who want to see your work process before you go too far down the wrong path.
To that end, we want to make every effort to create something cool.
Screen effects:
An easy way to do this is to enable ambient occlusion in the viewport.
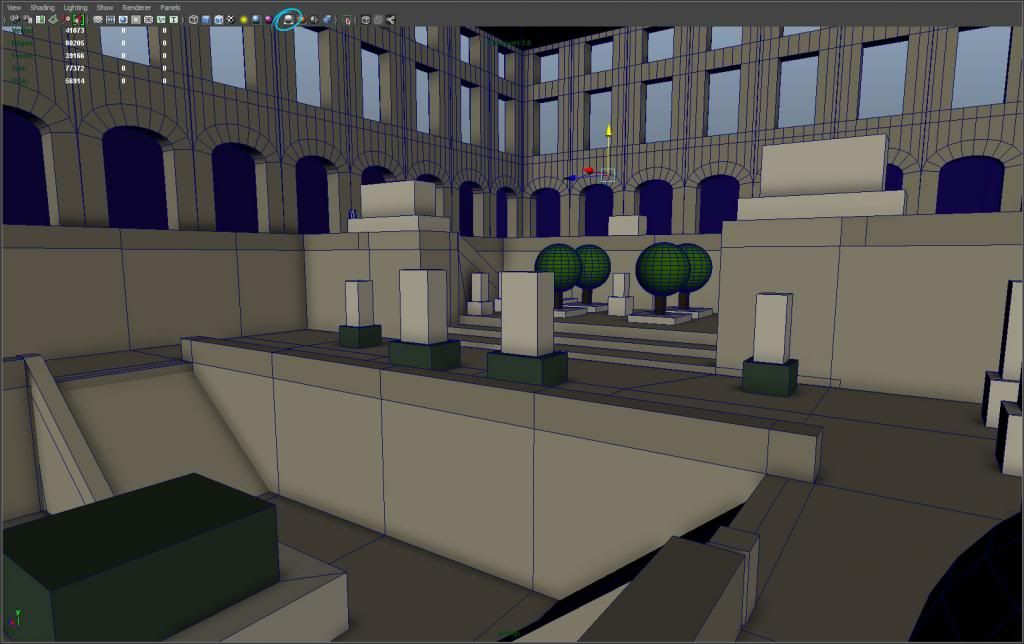
AO adds shadows around objects, grounding them and making things feel more solid. Obviously the AO isn’t all that accurate, but hey, it’s a button click and it renders in real-time! This is definitely a good ratio of effort to reward.
Speaking of quick changes, there’s a depth of field button, too. Usually DOF doesn’t work out of the box, however. You can see what happened when I enabled it in my scene below. If we want to use it, we’ll need to adjust some attribute settings in our camera.

All the settings we need for depth of field are in the attribute editor for our camera. There’s a depth of field rollout with distance and f-stop settings.
After changing the numbers for the distance and f-stop in my camera’s depth of field attribute, things look a bit better.
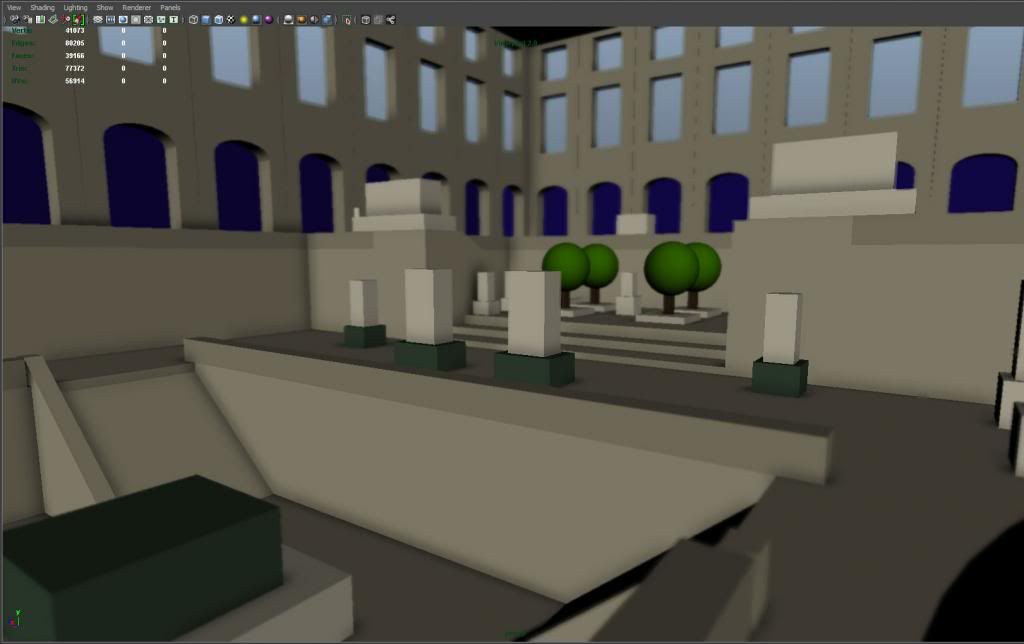
Next – time to start modeling and texturing?
No way! Remember, we’re working quickly here.
Modeling something is very time consuming, and that model only affects a small part of the scene.
Texturing something is a bit better, because you could create something that covers a large part of the environment. It is still a time-consuming process, though.
Lighting is the best choice – by adding a single directional light I can affect my entire scene!

Hey, I’m new to maya and have a few question regarding grid settings and scaling. I’v been doing a lot of searching around and can’t seem to find what I’m looking for so hopefully you guys can help. Now i know maya is used for modeling, thats obvious, but can you use maya to build a complete level then export it to unity for rendering purposes? I’m concerned because mayas grid seems to small for a complete level unless i have to scale objects really small to fit the grid. is it ok to build off the grid but stay leveled with the grid?
You can model off the grid, no worries. The grid is just a visual guide. You can adjust your scene’s unit of measurement in your window>settings/preferences>preferences menu, if you need to adjust to say, feet, to match your unity scene.
ok Great! thanks for your input james 🙂
Hey, been modeling stuff for environments and it is tough work I have to say, been at it on and off for about a year now and it still feels as if though I’m a novice. The thing that’s bothering me is the mapping that needs to be done and what type of mapping. UV mapping I can grasp but lightmapping and what else is there one should be aware of? I’ve been looking at architectural visualization and feels like it’s impossible to even come close to some renderings out there. I notice progress but my mapping seems wrong even though it’s right in my eyes. I wish I could put my finger on it. I’m not studying at a university or course so the amount of knowledge out there is overwhelming just grasping after something on the web. If I even got a question out of this post I don’t know, maybe I’m just getting rid of some steam, who knows.
Thanks for the well thought out tutorial by the way, certainly got me off the nitpicking when blocking out my scene. thanks!
What you are going through is normal. Right now, your eye and your mind are able to recognize when something is good, and when it isn’t. But your skills as an artist are still catching up, so you feel frustrated that you can’t match what you see in your head. Every artist goes through this! Keep practicing, eventually you will come out the other side.
I would advise, don’t focus on technical aspects. Focus on making things look good, even if you have sloppy geometry or UVs or whatever. Once you know how to make something look good, then you can go back and address technical issues.
Thanks for a great technique showcase!
One problem I keep having for 2 years now is that once I have 8 or so lights in the scene, any additional lights stop working! I have no idea how to fix this, and it is really limiting my lighting.
Any idea on what’s up with that?
P.S I found out that it is a software limitation… But how am I supposed to do this with just 8 lights? (really confused)
Ok I solved the problem.
I simply clicked on the Vieport 2.0 settings box, and there was a slider for maximum amount of lights that would show up.
Previously I changed the Viewport display setting (which is in the display preferences) to DirectX11 from OpenGL, not sure if you can increase the light limit with OpenGL.
All good 🙂
Glad to see you figured it out! Even with that slider, the lights do max out at some number (like 32 or 64). So for big scenes with lots of light sources, you are stuck with pre-rendering!
Your site overall is like a small Holy Grail for the evolving 3d artist. Thanks again and again, and this will be, at the risk of getting annoying, the last big thank you for now : )
Glad to hear it is helpful, Harry! 🙂